View the Fund Ownership Schedule
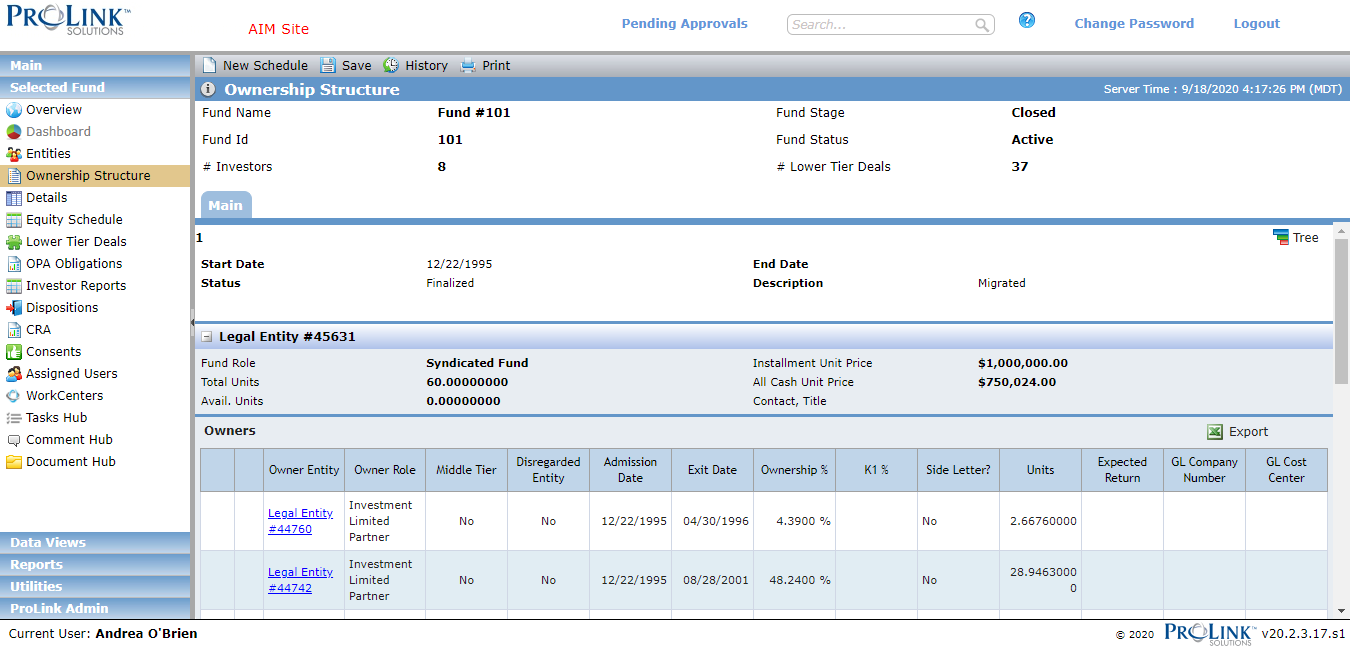
When you create a new fund, the application automatically creates an ownership schedule with the Syndicated Fund listed as the Owned Entity.
All information shown in the Owners grid is from data populated through a popup screen or from the Legal Entity record for the corresponding entity.
You might need to create a new schedule when changes are made to the ownership of the Owned Entity. Multiple proposed schedules can exist at one time.
Navigate to the fund, and select Ownership Structure in the left navigation menu.
The Ownership Structure screen opens.
Click New Schedule in the top toolbar.
The New Ownership Schedule popup opens.
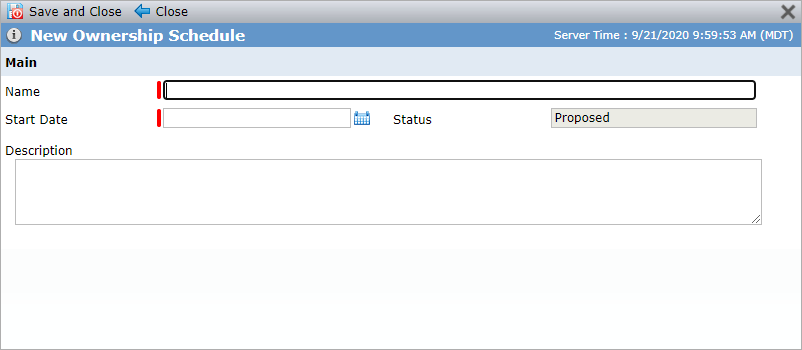
Enter the Name of the schedule.
Enter or select the Start Date.
Note that the Status defaults to Proposed.
Optionally, enter a Description.
Click Save and Close.
If there is an existing schedule, the application automatically copies the owners from the existing schedule to the new schedule.
You can edit the Name, Start Date, or Description for a proposed schedule. Click the Edit button  .
.
You can delete a proposed schedule by clicking the Discard button  .
.
While the schedule is in a Proposed status, you can edit the Owned Entity by clicking  .
.
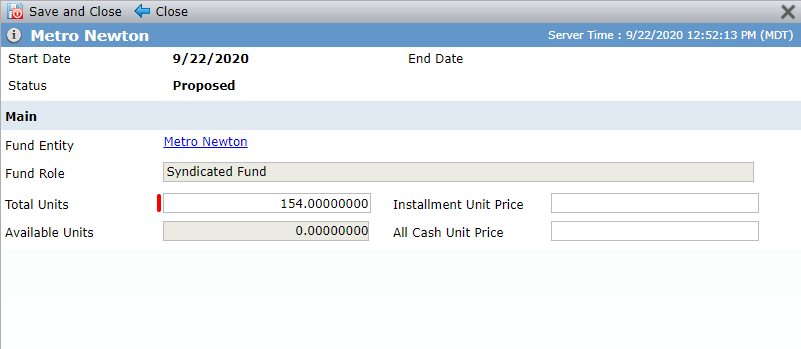
Click the fund entity hyperlink to view the Edit Entity screen.
Available Units equals the Total Units for the Owned Entity minus the sum of the Units Owned for the Owner(s).
After an Owned Entity is created, you can add Owners. While the schedule is in a Proposed status, you can remove an owner or modify their data. After the schedule is finalized, you can edit only certain fields (Close [Sign] Date and Notes).
If the Owner on a Proposed schedule is selected as the UT Fund Accounting Transactions Investor (Fund Details when fund is linked to reporting deal), you cannot remove them from the fund.
Note
You cannot add the owned entity as an owner entity.
Navigate to the fund, and select Ownership Structure in the left navigation menu.
The Ownership Structure screen opens.
Click New Owner above the Owners grid for the applicable Owned Entity.
The Find New Owner popup opens.
Entities that have a Role that is also an Ownership Role are displayed. If the entity is not listed, click Search All Entities to search for any entity in the application.
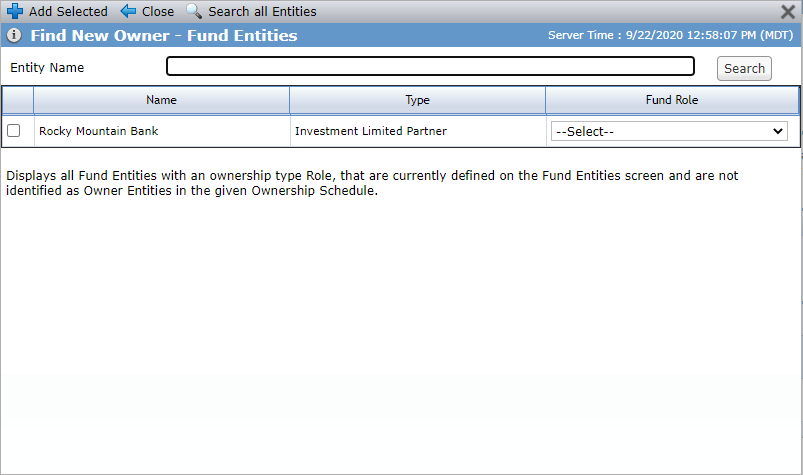
Select the checkbox of the entity to add as Owner.
Entities selected from the popup will also be added as an entity to the fund.
Select the Owner Role for the entity.
If the Owner is a Syndicated Fund, the application creates a Fund Load record on the deal's Equity Schedule.
Click Add Selected.
The Owner popup is displayed. It contains pertinent information for the owner such as the dates the owner owned the entity and their percentage of ownership.
Additionally, the percentage of tax credit benefits the owner is entitled to is also stored in the schedule. This allows ProLinkAIM to calculate the annual and quarterly amount displayed on the Benefit Schedule.
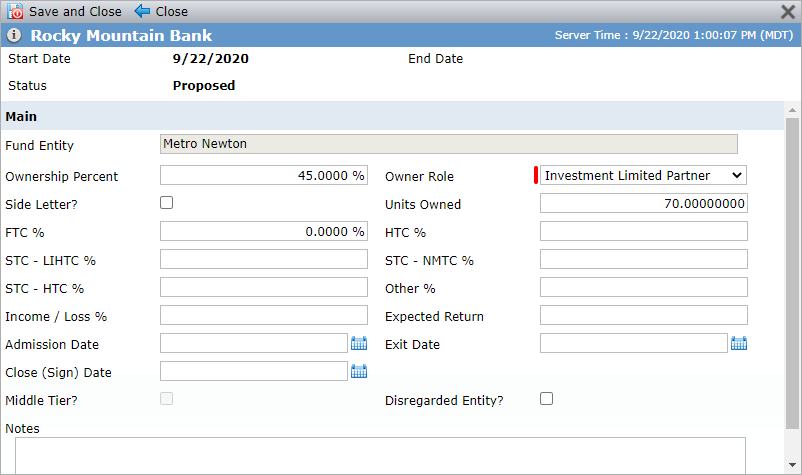
Complete the fields as needed.
The Exit Date cannot be before the Admission Date.
The GL Cost Center and Impairment Schedule fields are displayed only when the entity is a Bank Affiliate (Edit Entity - Main tab).
The GL Cost Center options are set up on the Edit Entity - Accounts tab.
When the Impairment Schedule checkbox is selected, the Owner Entity is available for selection on the Fund Impairment screen. If you subsequently clear the Impairment Schedule checkbox, the Owner Entity will no longer be available in the Impairment Schedule owner list, and the system deletes all previously calculated Impairment records for the Owner Entity.
Click Save and Close.
If you Close the Owner popup without saving, the selected owner is not added to the schedule.
Repeat steps 3–7 to add additional owners.
Click Save.
The owner is added to the schedule.
While a schedule is in a Proposed status, you can click the row of the Owner to open the Owner popup and edit the details for the Owner on the deal. (Clicking the hyperlink opens the Edit Entity screen.)
After the schedule is finalized, you are able to modify a few fields:
All Owners
Close (Sign) Date
Disregarded Entity
Notes
Only owners that are syndicated funds
Middle Tier
While a schedule is in a Proposed status, you can remove an Owner by clicking  at the beginning of the Owner row.
While a schedule is in a Proposed status, you can replace an existing owner with another entity.
Note
You cannot add the owned entity as an owner entity.
Navigate to the fund, and select Ownership Structure in the left navigation menu.
The Ownership Structure screen opens.
Click
 .
.The Replace Owner popup opens.
Entities that have a Role that is also an Ownership Role are displayed. If the entity is not listed, click Search All Entities to search for any entity in the application.
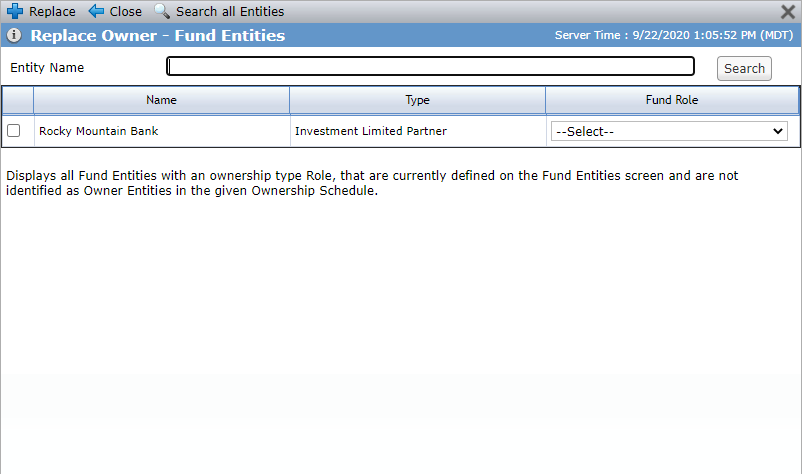
Select the checkbox of the entity to add as Owner.
Entities selected from the popup will also be added as an entity to the fund.
Select the Owner Role for the entity.
If the Owner is a Syndicated Fund, the application creates a Fund Load record on the deal's Equity Schedule.
Click Add Selected.
The Owner popup is displayed. It contains pertinent information for the owner such as the dates the owner owned the entity and their percentage of ownership.
Complete the fields as needed.
The Exit Date cannot be before the Admission Date.
Click Save and Close.
If you Close the Owner popup without saving, the selected owner is not added to the schedule.
Click Save.
The replacement owner is added to the schedule. The owner being replaced remains in the schedule, with the Exit Date populated; the Exit Date will default to one day prior to the Admission Date of the new Owner.
The finalized schedule is the default schedule that is displayed. To see other schedules, scroll down to the Schedule History grid.
After you have added the owners and all data is completed for the schedule, you can finalize the schedule.
To finalize a schedule, the following fields in the Owners popup must be populated: All tax credit % fields, Income/Loss %, Ownership %, Admission Date.
If the sum of the Units for each Owner does not equal the Total Units for the Owned Entity from the first Admission Date to the current date, then the system issues a warning. However, you can proceed with finalizing a schedule with this scenario.
Navigate to the fund, and select Ownership Structure in the left navigation menu.
The Ownership Structure screen opens.
Click
 .
.The page is refreshed, and the screen is updated to reflect the change.
If there is a current finalized schedule, its status is updated to Prior.
If multiple schedules exist, the Schedule History grid at the bottom of the screen shows the finalized schedule first, followed by any proposed schedules, and lastly any prior schedules.
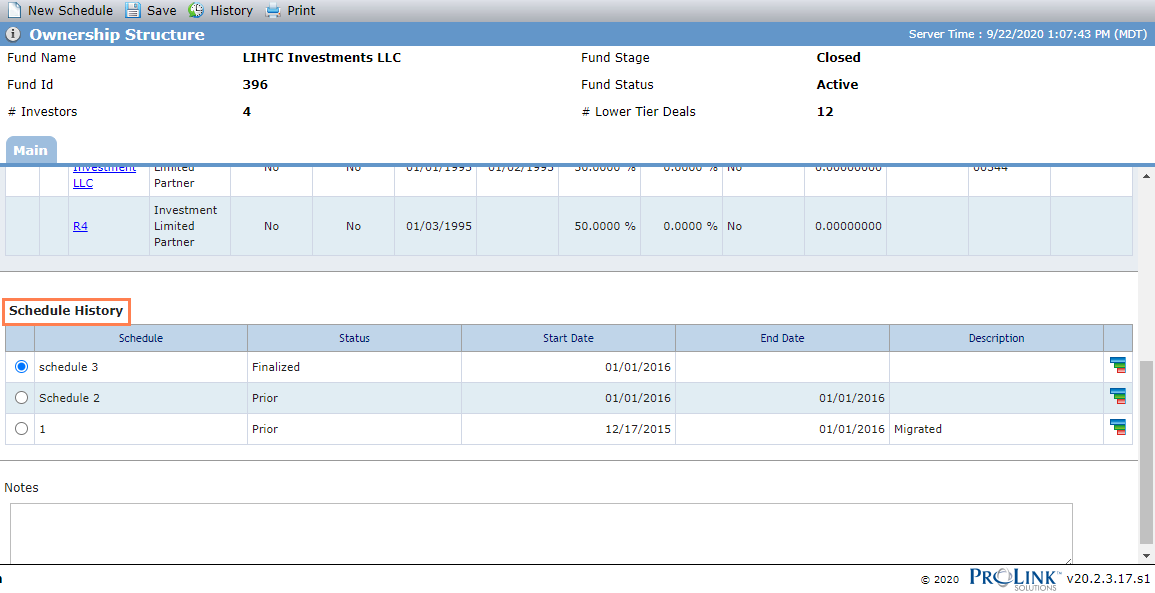
The Tree view  displays the Ownership Schedule visually, showing the Owner's Ownership Percentage and Role.
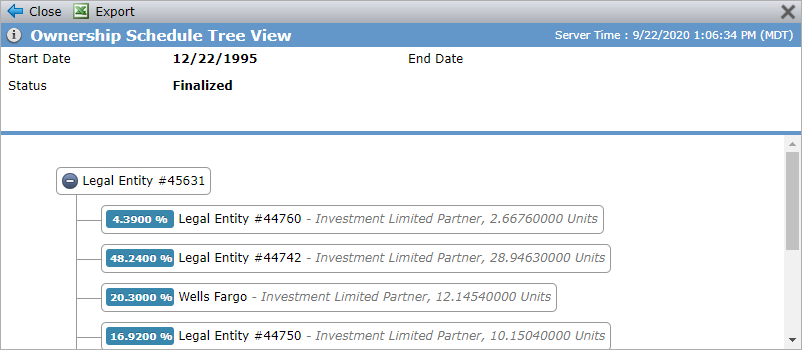
If multiple Owned Entities exist for one schedule, multiple trees are displayed in the view.