Documents in ProLinkAIM
Most of the Edit screens throughout ProLinkAIM include a Documents tab. This tab allows you to attach a file to a specific item or area within the system. The Documents tab allows you to upload, store, and view files. You can add files one at a time or several at the same time. The Documents grid is a read-only grid that displays a list of all files that have been uploaded to the specific Edit screen. The Document column provides a hyperlink to the file that allows you to view the file.
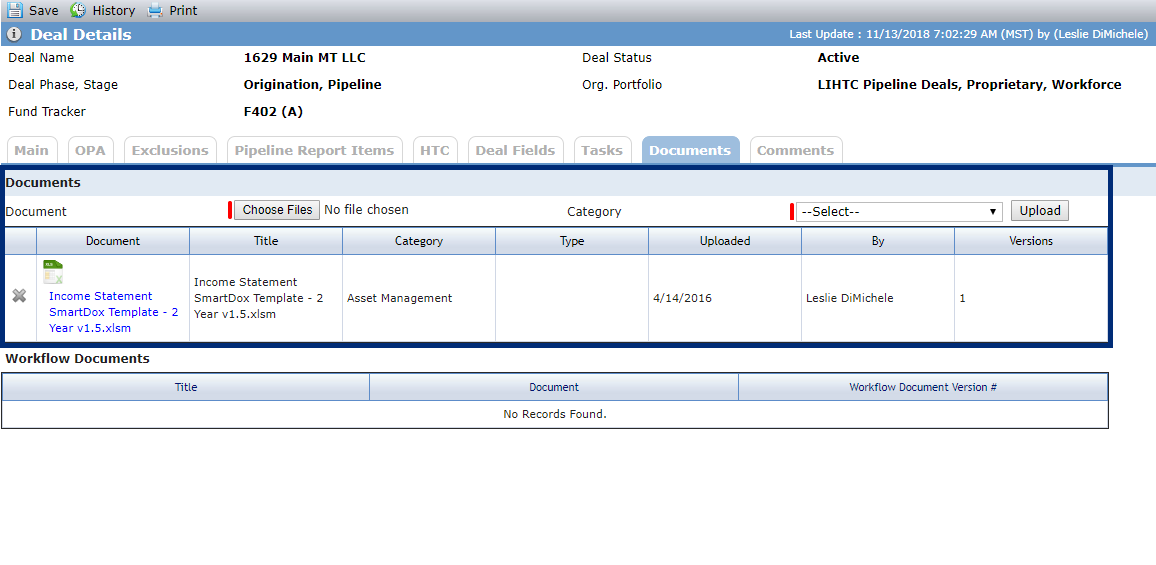
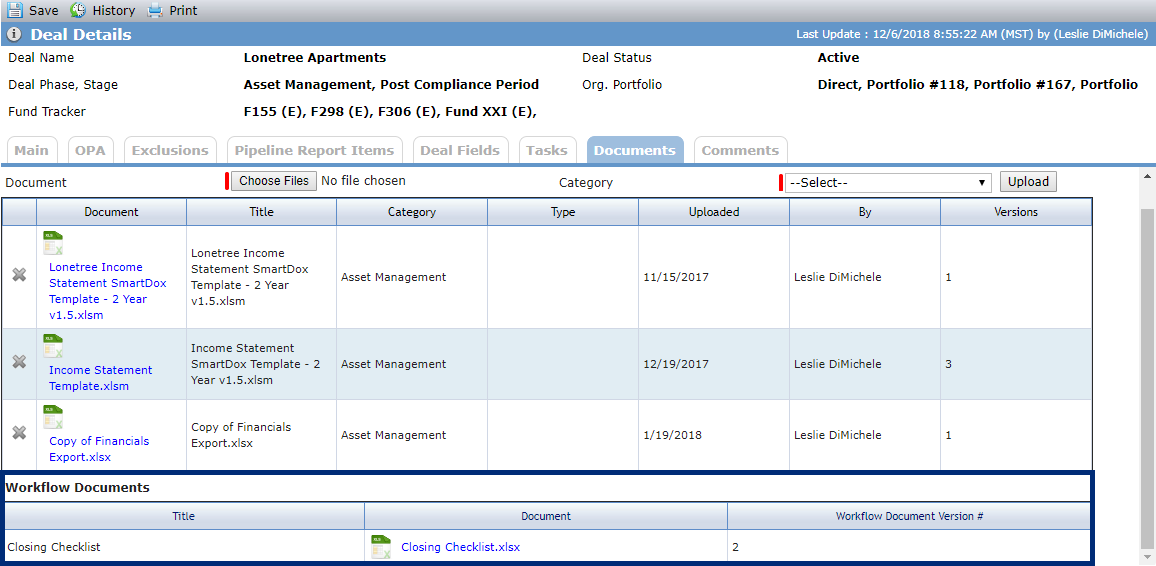
The Workflow Documents grid is also a read-only grid, but it displays template files that were associated to the object by way of a workflow.
The grid displays the name of the workflow file, a hyperlink to the file that opens in the associated program (for example, an XLSX file is opened in Excel), and the version of the file.
Please see the Workflow training material for information about this functionality.
Add a File from the Documents Tab
Click the Documents tab on the applicable Edit screen.
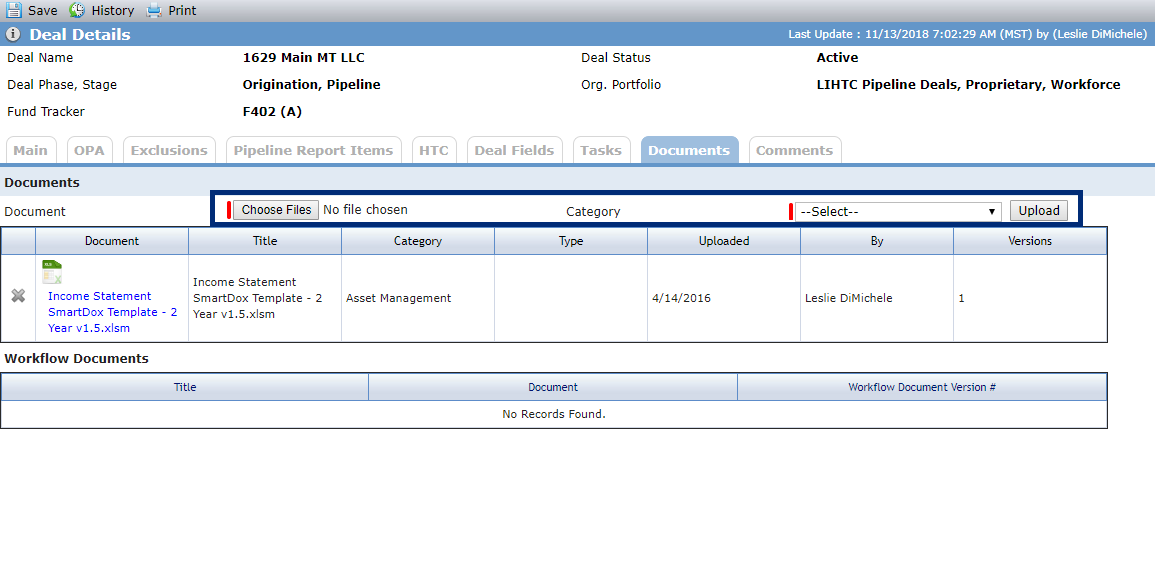
Click Choose Files.
The browser's file selection window opens.
Navigate to the location of the file(s), and select the file(s).
Select the Category for the file(s), and then click Upload. The file is displayed on the Documents tab.
Document Hub
Documents are also located within the Document Hub and grouped based on where the file was attached. To access the Document Hub screen, navigate to the Selected Deal or Fund from the left navigation panel and select the Document Hub option.
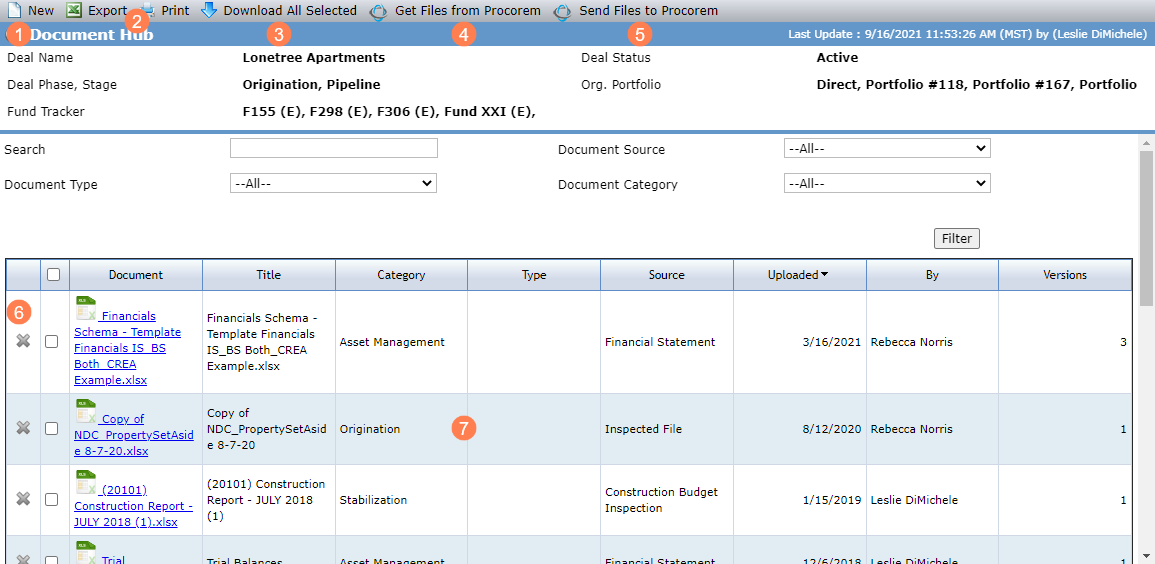
From the Document Hub, you can:
Export or print the list of files.
Delete a file.
Click in the row to open the Edit Document screen and view the details of the file.
Add a File from the Document Hub
Navigate to the deal or fund, and select the Document Hub option in the left navigation panel.
Click New in the top toolbar.
The Edit Document screen opens.
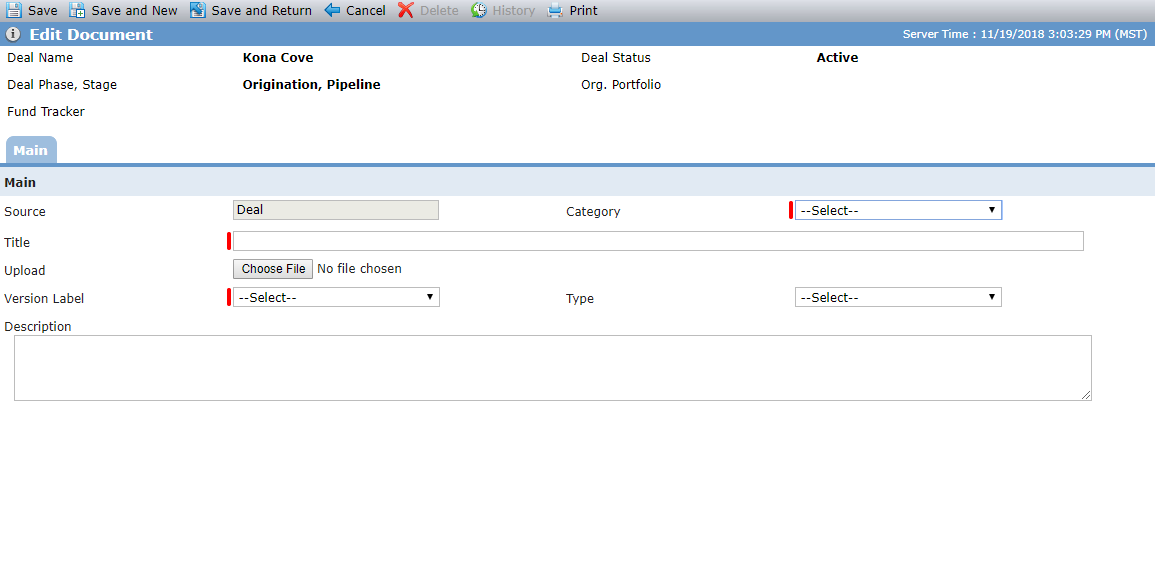
Select the Category for the file.
Enter a Title for the file.
Click Choose File.
The browser's file selection window opens.
Navigate to the location of the file, and select it.
Click Save.
Download Files
To download a single file, click the hyperlink in the row of the file.
To download multiple files, select the checkbox(es) in the row of the file(s), and then click Download All Selected. You can also select the checkbox in the grid header row to select all files. The files are contained in a zip (compressed) file.
Caution
You can download up to 2 GBs or 30 individual files at one time.
Get Files from Procorem
Navigate to the deal or fund, and select the Document Hub option in the left navigation panel.
Click Get Files from Procorem in the top toolbar.
A popup opens that walks you through copying document(s) from Procorem to ProLinkAIM.
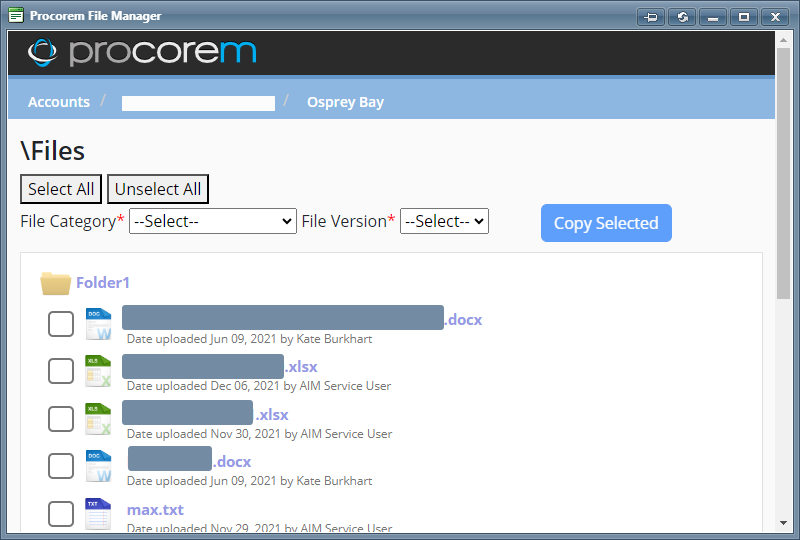
If you are not logged into Procorem, you are prompted to do so.
If needed, click the account name in the breadcrumb bar to select files from a different WorkCenter. You can view all WorkCenters to which you have access or only those linked to the current, primary WorkCenter.
Select the document(s) to copy to ProLinkAIM.
You can select a folder to import the folder and its contents, or click the folder to open it and select individual files.
Select the File Category and File Version. If you do not make a selection for both fields, you will receive an error.
The picklist values for these fields are defined in ProLinkAIM. Contact your system administrator if you have questions.
Click Copy Selected.
Close the popup.
The document(s) you added are listed in the grid. If a document already existed in the Document Hub, the document from Procorem is added as the current version.
Send Files to Procorem
Important
The system administrator should ensure the following ProLinkAIM configuration settings are set up in order to send files to Procorem:
ProcoremAccountId
ProcoremEnable
ProcoremUploadFileLocation
MaxSendFilestoProcorem
Navigate to the deal or fund, and select the Document Hub option in the left navigation panel.
Select the document(s) to copy to Procorem.
Click Send Files to Procorem in the top toolbar.
A popup opens that walks you through copying document(s) from ProLinkAIM to Procorem.
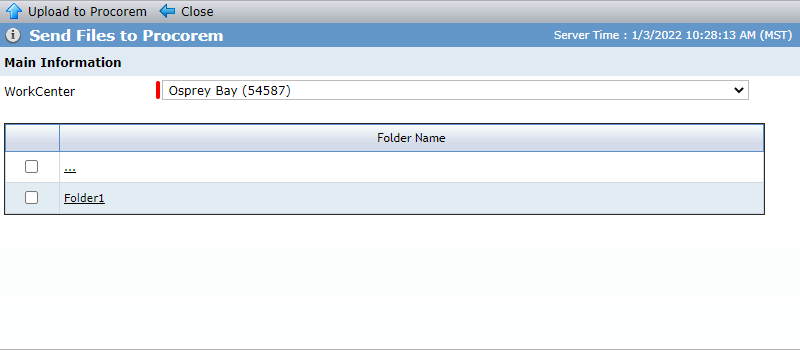
If you are not logged into Procorem, you are prompted to do so.
If needed, select the WorkCenter to send the file(s) to. If a linked WorkCenter exists for the deal or fund, then the selection defaults to this WorkCenter.
You can select any WorkCenter in the account even if you do not have access to it.
Select the checkbox of the folder location to send the file(s) to.
You can click a folder in the grid to navigate into the folder. Note that the ellipsis (...) can indicate the top level of the WorkCenter or folder. It can also be navigational, allowing you to move back up if you have drilled into a folder.
Click Upload to Procorem.
Close the popup.
The document(s) are copied to Procorem. If the document already existed in the selected location in Procorem, the document from ProLinkAIM is added as the current version. The action is recorded as being performed by an "AIM Service User."