Configure Template Checklists and Attach to a Template
Template checklists allow you to define standardized lists of tasks that must be completed before a deal advances from one phase or stage to the next. By configuring template checklists in advance, you ensure that every deal follows a consistent, auditable workflow—reducing the risk of steps being overlooked and improving process compliance across your team.
As a ProLinkAIM admin, you are responsible for creating and maintaining these checklists. Each checklist is associated with a specific Deal Phase and Deal Stage, and contains one or more checklist items that track individual tasks.
Set up a checklist with checklist items—Your organization will create, update, and maintain template checklists through the Admin panel.
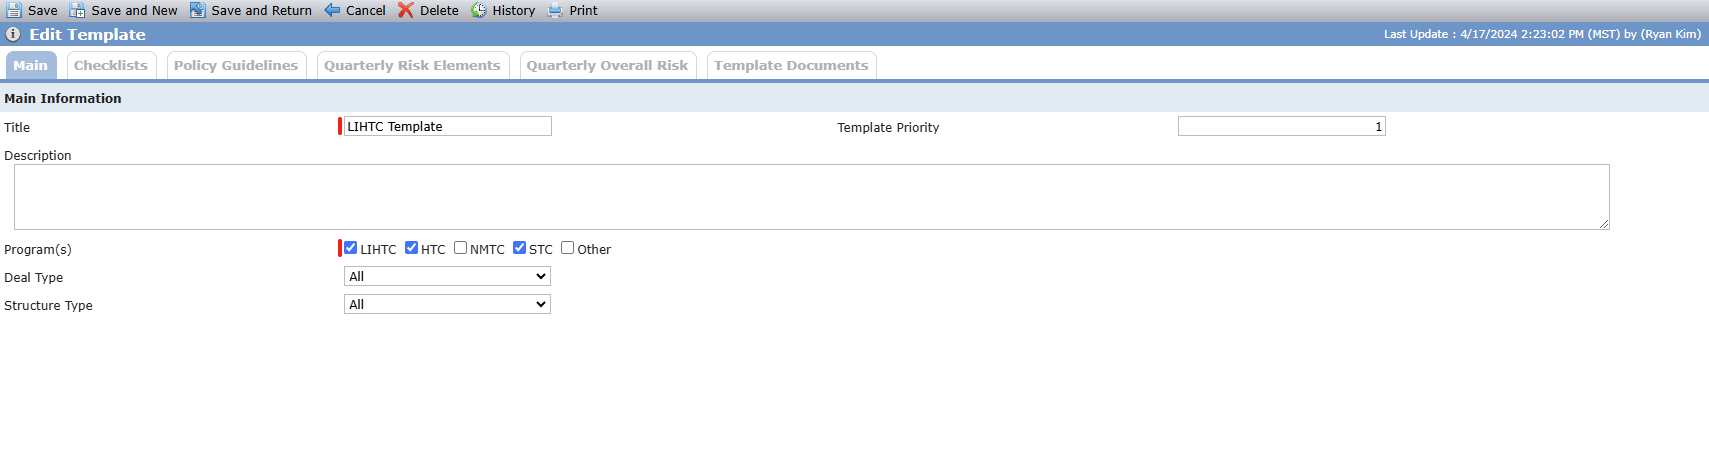
Add the checklist to a template—Your organization will add relevant template checklists to each template through the Admin panel. A template is associated to a deal based on program(s), deal type, and structure type.
View and edit the checklist at the deal level—The deal team can follow the checklist as it is attached to the deal or adjust it as needed.
For information about checklists at the deal level, see Deal Checklists.
The Template Checklist Items menu option in the Admin panel allows you to create and activate template checklists, which you can then assign to a template(s) so that the system will bring relevant checklists into deals.
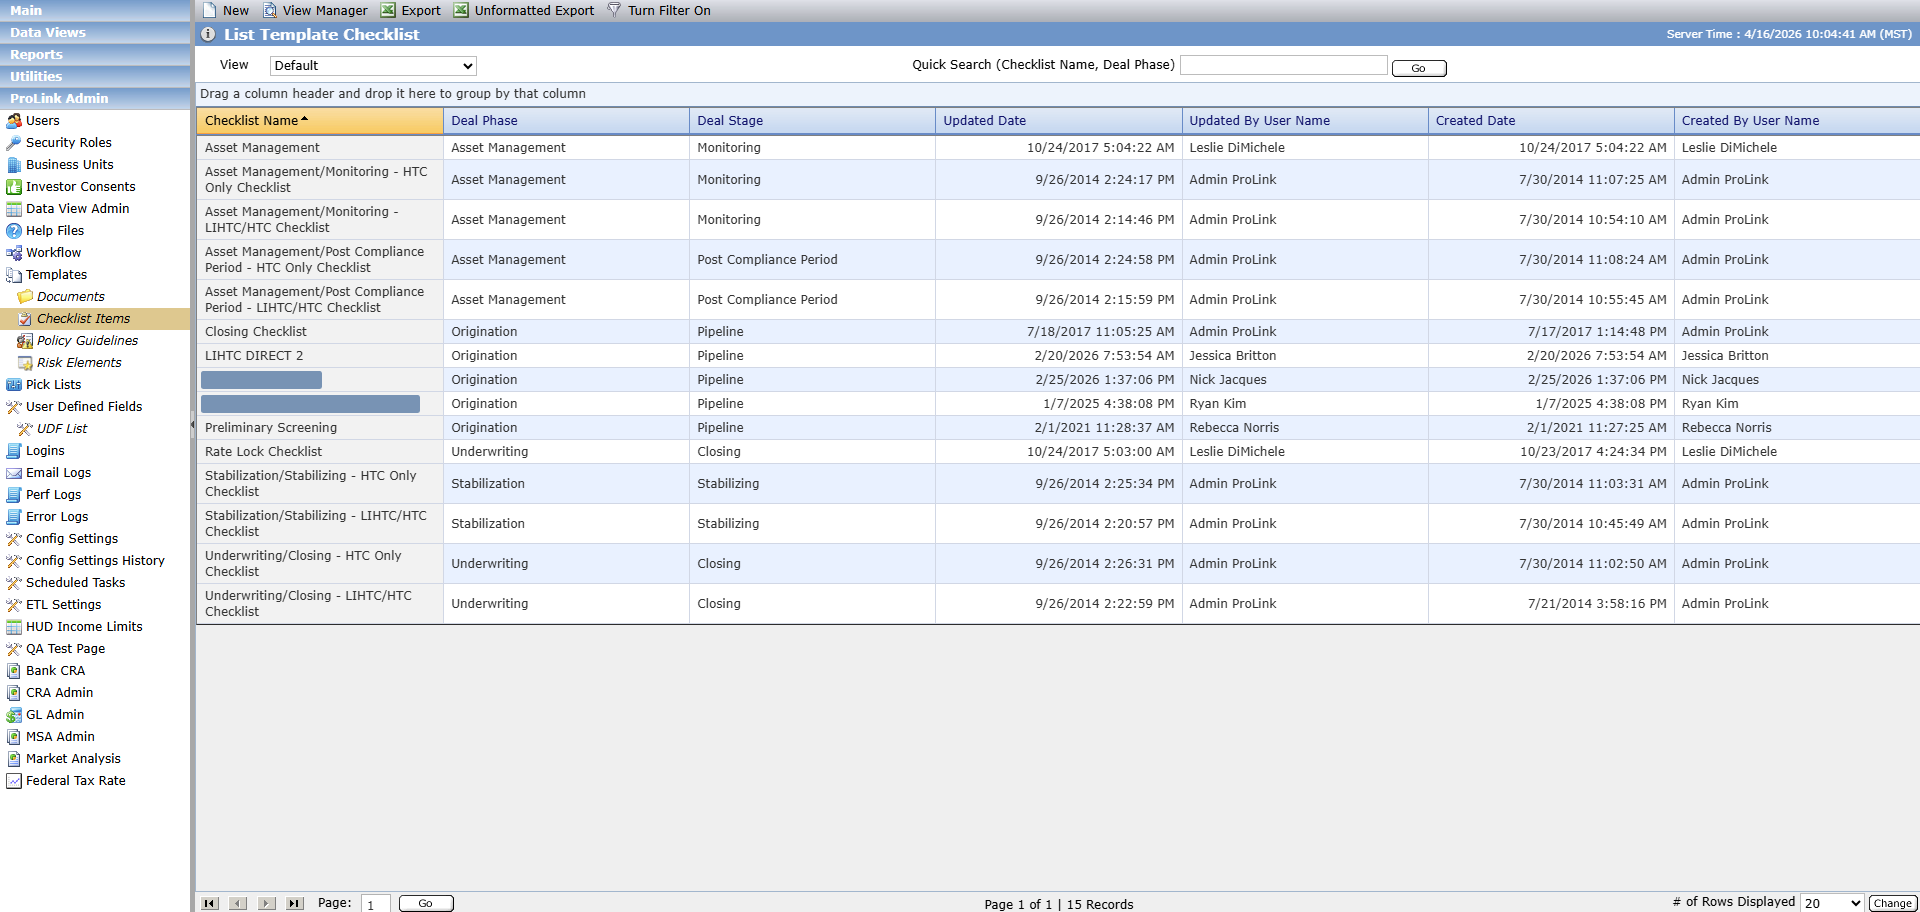
The List Template Checklists screen is a data view, which means you can leverage the search, filtering, grouping, and sorting functionality you are familiar with.
A template checklist is the parent record that defines which deal phase and stage the checklist applies to. Individual checklist items are added to the template checklist after it is created (see Add a Checklist Item to a Template Checklist).
Navigate to the List Template Checklists screen.
Click New in the top toolbar.
The Edit Template Checklist screen opens.

Complete all required fields.
Click Save.
Field | Description |
|---|---|
Name | A descriptive name that clearly identifies the purpose of the checklist (for example, "Pre-Close Due Diligence" or "Offer Acceptance"). TipUse a naming convention that incorporates the phase and stage—for example, "Phase 2 – Stage 3: Underwriting Review"—so that templates are easy to identify at a glance on the list screen. |
Deal Phase | The deal phase this checklist is associated with. |
Deal Stage | The specific stage within the selected deal phase at which this checklist applies. |
Is Active | Indicates whether this template checklist is currently in use. Set to active to make the template checklist available for templates and deals. |
Checklist items are the individual tasks within a template checklist. Each item can have its own due-date offset, sort order, and additional metadata to guide deal teams.
Navigate to the List Template Checklists screen.
Select the template checklist to which you want to add an item.
The Edit Template Checklist screen opens.
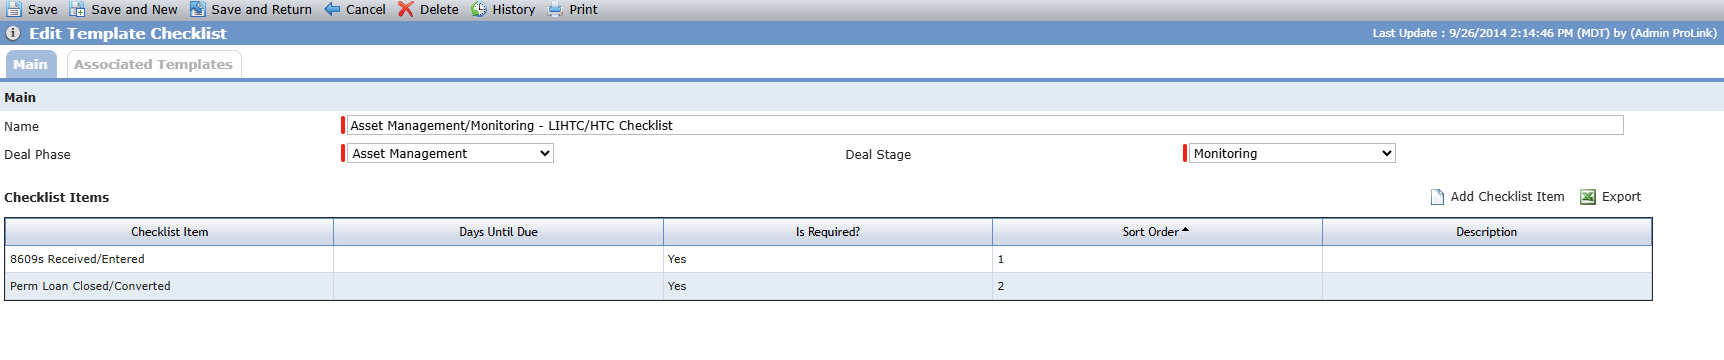
Click Add Checklist Item above the grid.
The Edit Template Checklist Item screen opens.
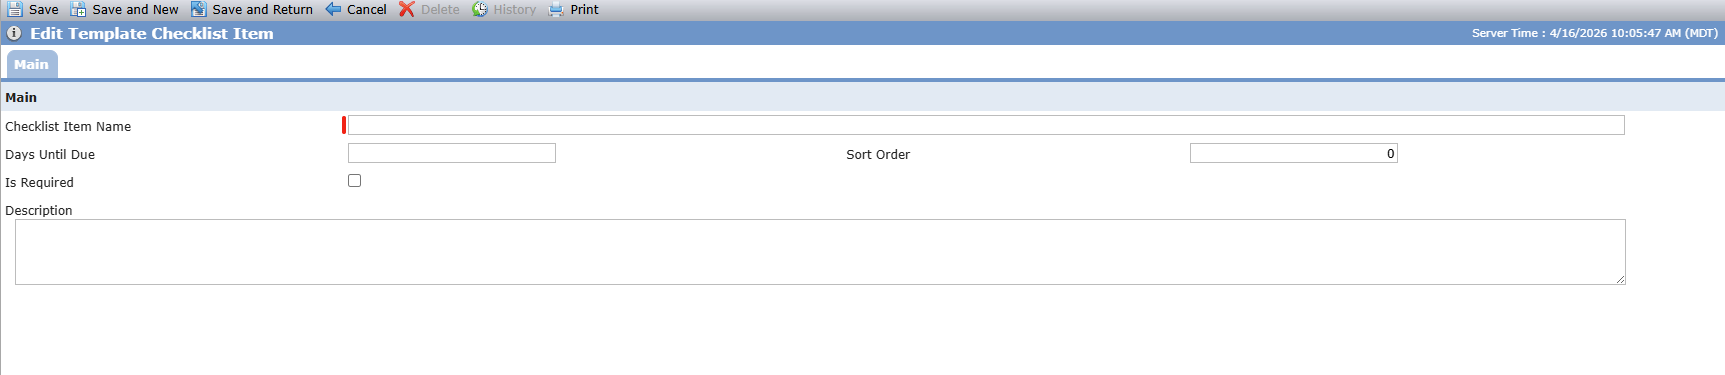
Complete all required fields and any additional optional fields that will provide useful context for deal teams.
Click Save.
Field | Description |
|---|---|
Checklist Item Name | Required. A concise, action-oriented description of the task (for example, "Obtain signed purchase agreement" or "Verify title search"). |
Days Until Due | Required. The number of days from the checklist trigger date by which this item must be completed. Enter a whole number. |
Sort Order | Required. Determines the display order of this item within the checklist. Lower numbers appear first. Use consistent increments (for example, 10, 20, 30) to allow future items to be inserted without renumbering. |
Is Required | Indicates whether this item is mandatory. When enabled, deal teams are alerted that the item must be completed before the deal can proceed. |
Additional Details | Optional free-text field for instructions, references, or clarifying information that will help deal teams complete the task correctly. |
After you have configured template checklists for the organization, you can attach them to a template(s).
Tip
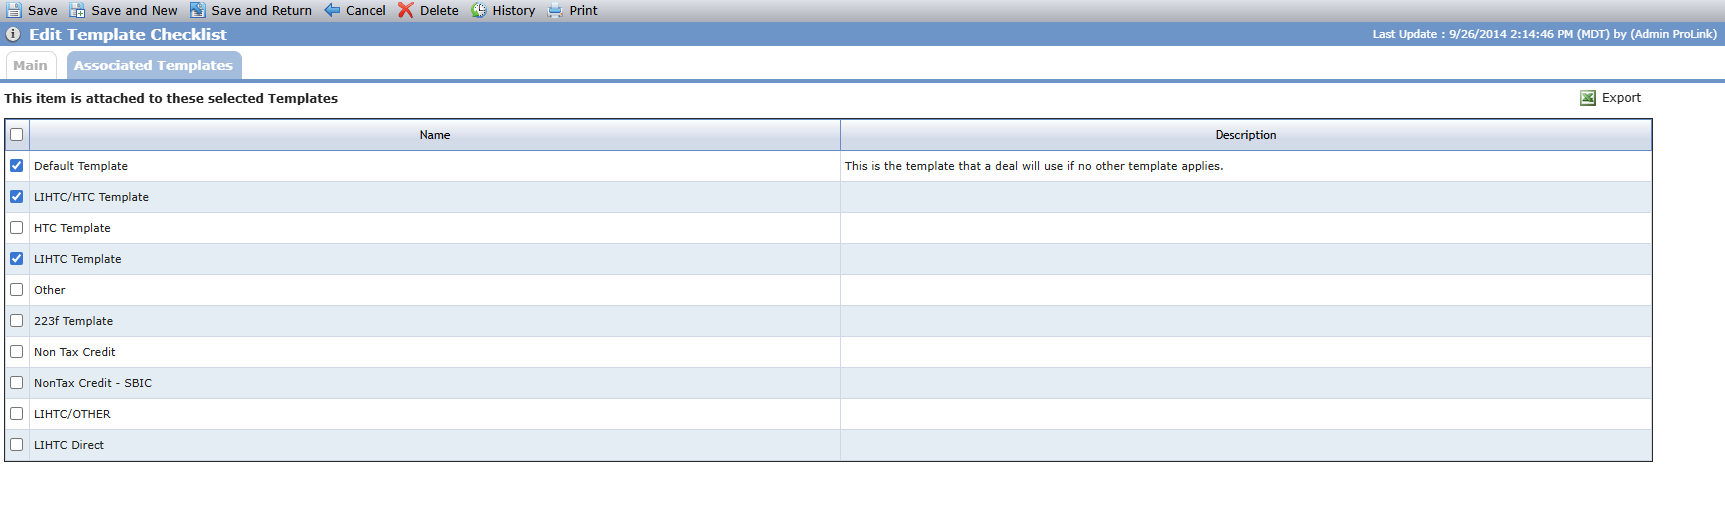
You can view the templates that the Template Checklist is attached to on the Associated Templates tab.
Navigate to the Templates option in the ProLink Admin panel.
The List Templates screen opens.
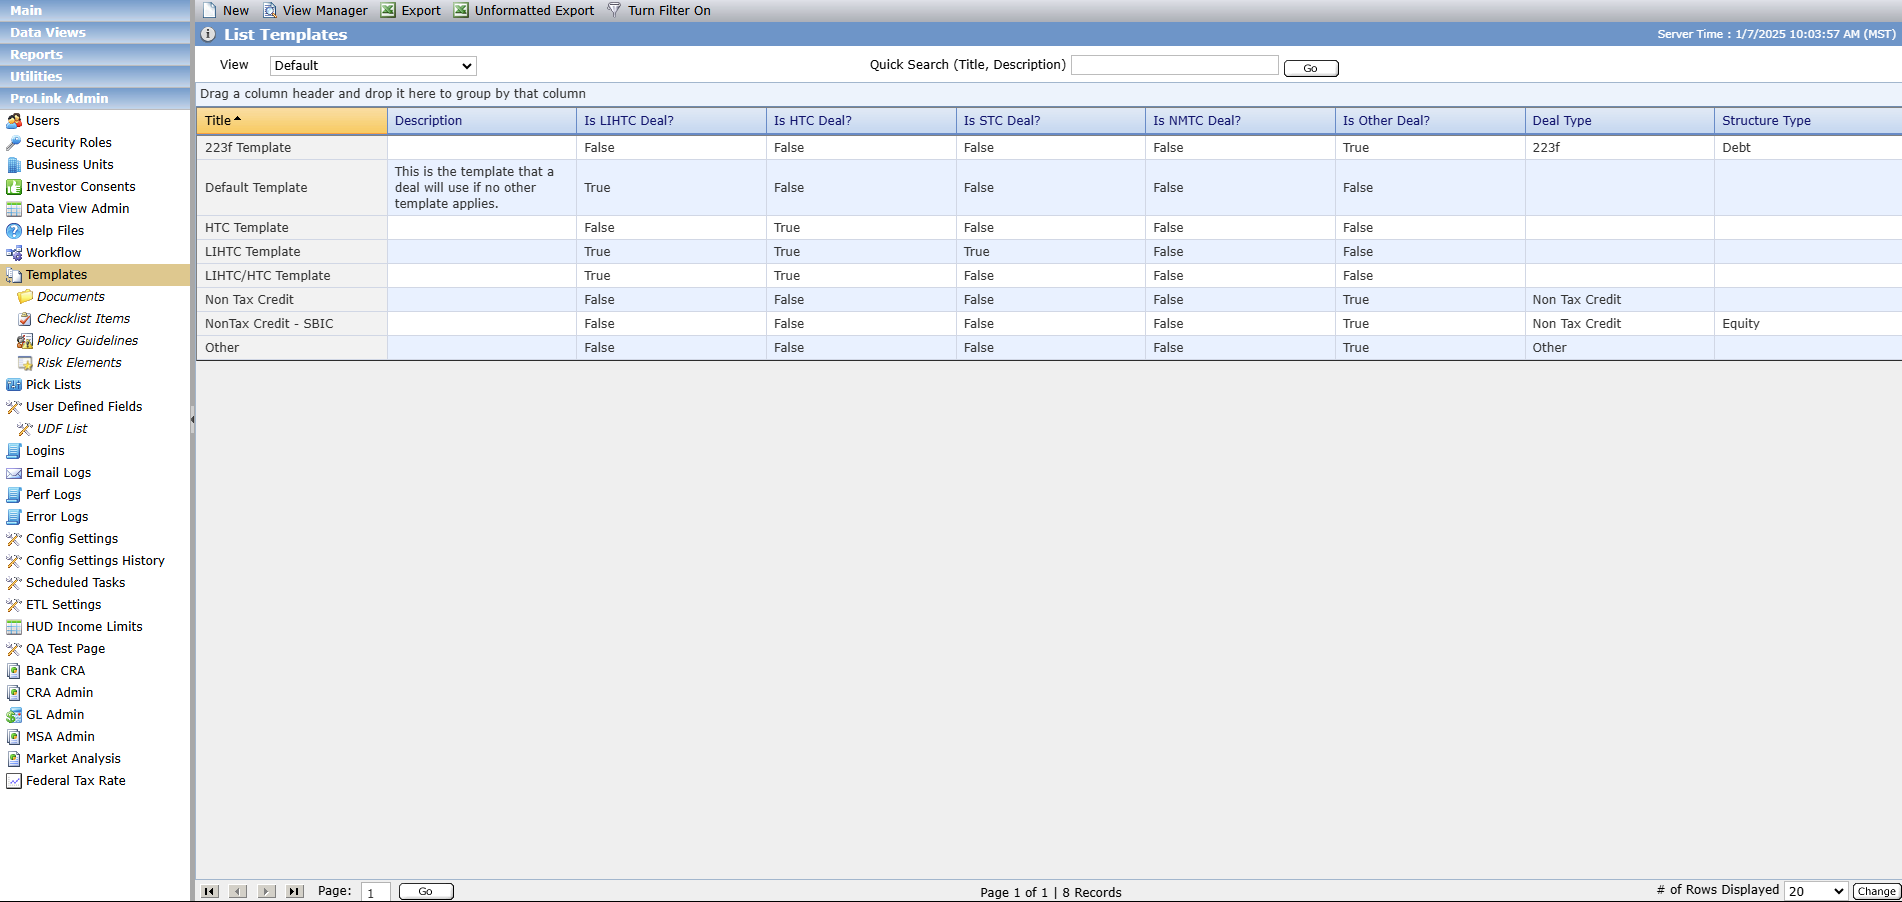
Select the template to edit.
The Edit Template screen opens.
Click the Checklists tab.
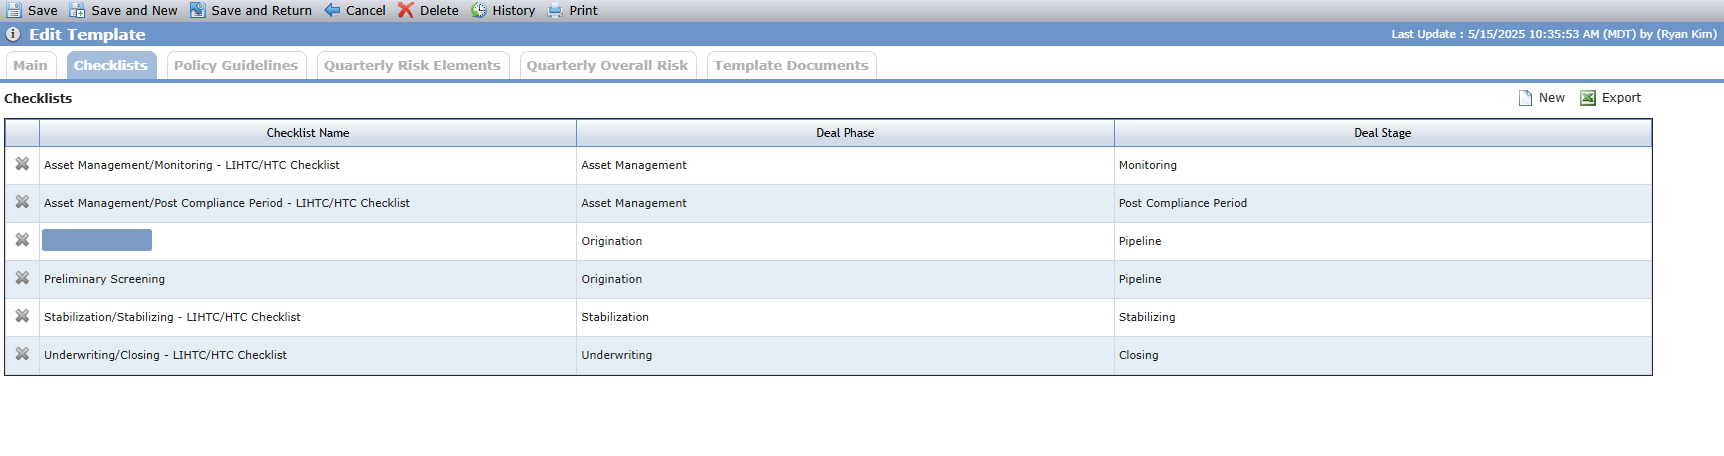
Click New above the Checklists grid.
The Find Template Checklists popup opens, populated with all configured Template Checklists that have not yet been attached to the template.
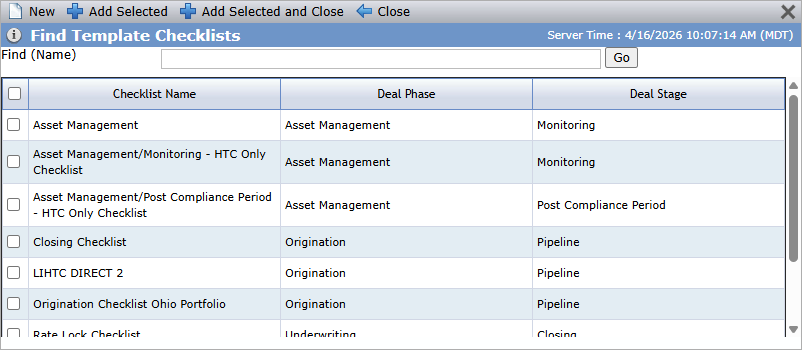
Select the checkbox(es) of the Checklist(s) to attach.
Click Add Selected and Close.
Click Save.
Task | Where to Start |
|---|---|
View all template checklists | Admin > Templates > Checklist Items |
Search template checklists by name or phrase | List Template Checklist screen > Quick Search |
Create a new template checklist | List Template Checklist screen > New |
Add a checklist item to a template checklist | Edit Template Checklist screen > Add Checklist Item |
Edit a template checklist or checklist item | Open existing > Update fields > Save and Return |
Delete a template checklist | Edit Template Checklist screen > Delete > Confirm OK |
Delete a single checklist item | Edit Template Checklist Item screen > Delete > Confirm OK |
Attach a template checklist to a template | Admin > Templates > Open template > Checklists tab > New |