Map ProLink SmartDox
This information is for system administrators or super users who are responsible for setting up the SmartDox templates.
With the SmartDox Map Fields feature, you can configure a Microsoft Excel or Word document to get data from and send data to the ProLink application.
The Map for ProLink SmartDox window is the heart of mapping fields in a template to data points in the ProLink application.
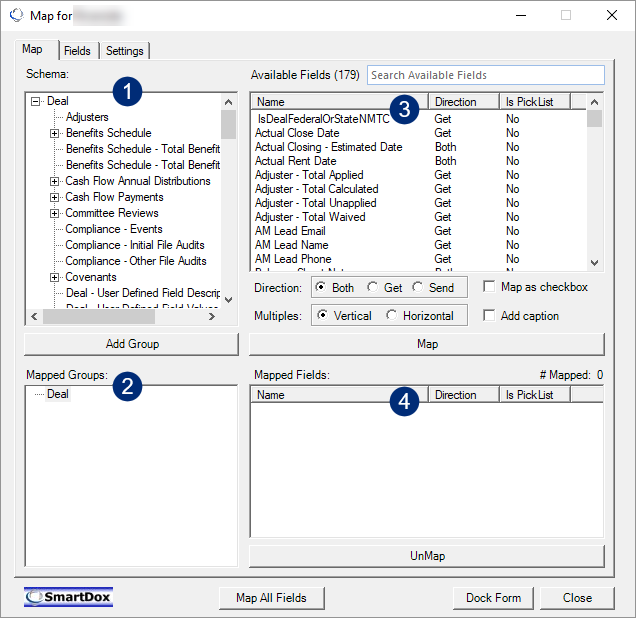
The Schema section of the Map for ProLink SmartDox window displays a hierarchy of Schema Groups from which data points can be selected to map in the SmartDox template. The top level Schema Group is the base record of the Schema selected for the template (such as entity, property, or deal). Beneath that Schema Group are further Schema Groups that represent related record types from which individual data points can be selected.
The Mapped Groups section of the Map for ProLink SmartDox window displays a hierarchical list of Schema Groups that have been added to the template so that the individual data points from the Schema Groups can be used with mapped fields.
You must add the parent Schema Group before adding a child Schema Group.
The Available Fields section of the Map for ProLink SmartDox window displays a list of data points associated with the Schema Group selected in the Mapped Groups section. It also displays the direction of each data point and whether the field is a picklist. You can sort the Available Fields section by clicking a column header in the section.
If a data point in the Available Fields section is marked as a picklist, it has a pre-defined set of valid values that can be selected. It will appear as a drop-down menu of those values when it is mapped to a SmartDox template.
Note
In Microsoft Word, mapped picklist fields with more than 24 options will not appear as a drop-down list. Instead, when the field is clicked, a separate window will open displaying the list of all available options. Selecting an option from the list will choose that option for the mapped field.
Below the Available Fields section are the options to use when mapping data points to fields in the SmartDox template.
Option
Description
Direction
Direction determines which direction data can flow to/from the SmartDox template. The direction selected cannot conflict with the direction specified with the data point in the Available Fields section.
Data points with a direction of Get can only retrieve data from the ProLink application and place it into the mapped template for viewing.
Data points with a direction of Send can only send data from the mapped template to the ProLink application, where it will be visible through the web-based interface.
Data points with a direction of Both can both be retrieved from the ProLink application and sent to the ProLink application.
For data points with Both as the direction, either Get, Send, or Both can be selected in the options when mapping the field. Selecting Get or Send for these data points limits the transfer of data to the choice selected. For data points that only allow Get or Send, only the option listed as the direction for that data point may be selected.
Do not map a cell that has a formula or reference with the direction of Get or Both. Doing so would remove the formula or reference.
Map as checkbox
If selected, this option specifies that the data point be displayed as a checkbox within the SmartDox template.
Note
Any data point can be mapped as a checkbox, but this option should only be used where it makes sense. If a data point is a checkbox in the web-based ProLink application, it is most likely appropriate to map that data point as a checkbox in the SmartDox template. A Name data point, however, is an example of a field where it would not make sense. Mapping this type of field may have unintended consequences and should be avoided.
Multiples
Multiple data points can be mapped to the template at the same time by holding down the CTRL key and selecting all of the data points in the Available Fields section, selecting a starting location in the template, selecting Vertical or Horizontal, and clicking Map. If Vertical is selected, all selected data points will be mapped in consecutive rows of the template. If Horizontal is selected, all selected data points will be mapped in consecutive columns of the template.
Caution
Mapping multiple fields horizontally is possible, but not recommended. Horizontally mapped fields do not always appear in a user-friendly layout.
Add caption
If selected, this feature will add a label next to the data point in the SmartDox template. In most instances this label will appear to the left of the mapped field. When mapping multiple fields horizontally, the labels will appear above the fields. Mapping fields horizontally requires a blank first row to accommodate the captions.
The Mapped Fields section of the Map for ProLink SmartDox window displays a list of those data points that have been mapped to fields in the template. From this section, a mapped field can be selected and unmapped from the template using the UnMap button.
Other options on the Map for ProLink SmartDox window include:
Map All Fields—If clicked, this button maps all fields in all schemas and groups. This process can take several minutes to complete.
Dock Form—Click this button to anchor the Map for ProLink SmartDox window to your monitor window. Clicking Undock Form returns the window to a floating window.
Search—Use the search field above the Available Fields panel on the Map tab to search the fields that can be mapped. Alternatively, use the search field on the Fields tab to search all mapped fields.
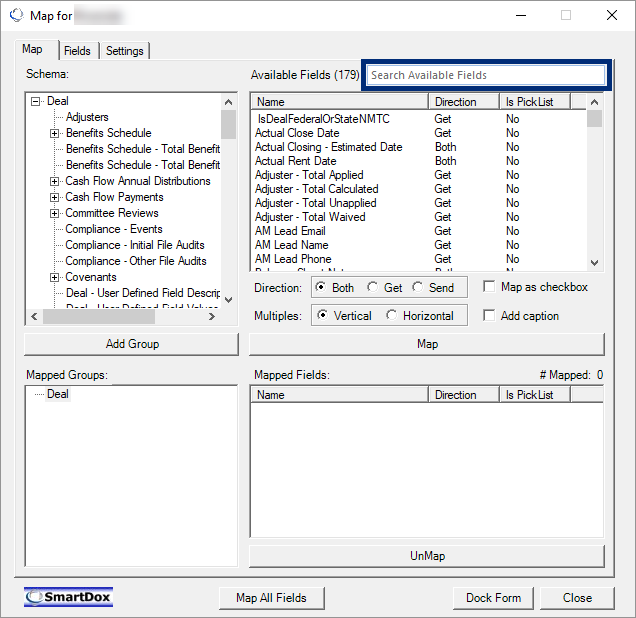
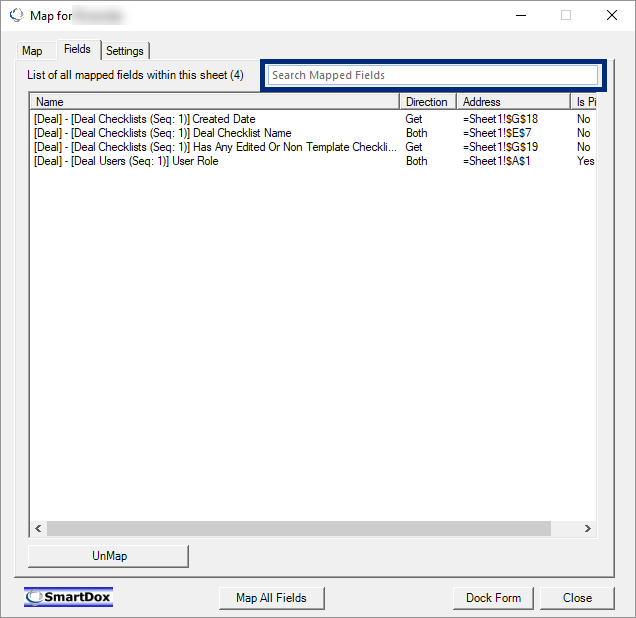
Map tab; Fields tab