Map Fields Step-by-Step
These instructions are similar for both Microsoft Excel and Microsoft Word. The primary difference between the two applications is that, in Excel the location to which a data point should be matched is a cell, while in Word the location is any location where the cursor can be placed. In these instructions, both of these locations are referred to as the “location.”
Open a new Microsoft Excel or Word document.
Click Map Fields in the ProLink menu.

If working with a new template, the Select Schema Type window opens. Select the desired Schema for the template and click OK. Otherwise, skip to step 5.
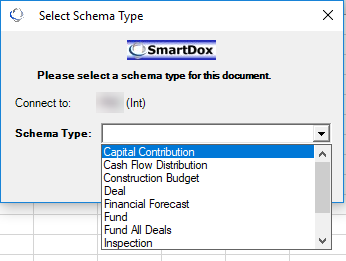
After selecting a Schema, save the template. Select the desired location, enter a filename, and click Save.
The Map for ProLink window will appear.
Within the Schema section of the Map for ProLink SmartDox window, select a Schema Group to be added to the template and click Add Group.
The parent Schema Group of the Schema Group to be added must be selected in the Mapped Groups section.
Note
The top level Schema Group is added to the template by default. All data points associated with the top level Schema Group automatically appear in the Available Fields section until you select a different Schema Group in the Mapped Groups section.
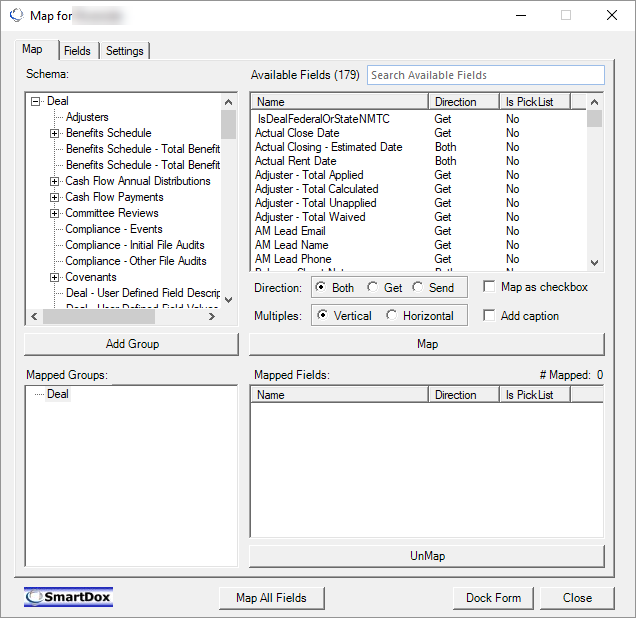
Repeat step 5 until all necessary Schema Groups have been added to the Mapped Groups section. All parent Schema Groups must be added to the Mapped Groups section before you can add an individual child Schema Group.
Click a Schema Group in the Mapped Groups section to populate the Available Fields section with a list of data points that can be mapped to the template.
Select one or more data points in the Available Fields section to be added to the template.
Choose the direction of the mapped fields, whether the field should be mapped as a checkbox, the direction that multiple fields should be mapped (if you select multiple data points), and whether a caption should be added to the mapped fields.
Switch to the window of the Microsoft Excel or Word template and select the location to which the data points should be mapped. If mapping multiple fields, the selected location will be the location of the first field.
Note
If you select the Add Caption checkbox, space must be available for the caption. For most mapped fields an additional space to the left of the selected location must be available for the caption. When mapping multiple fields horizontally, additional space is necessary above the selected location.
Click Map.
Note
To map a single data point to multiple merged cells in Microsoft Excel, first map the data point to a single cell, and then merge that cell with other cells.
You can only map a field once. To map multiple copies of the same field to a field within the template, add the desired Schema Group to the Mapped Groups section again. Refer to Step 5 above for details on mapping groups. The group will be added with “(Seq: ###)” after its name. Continue adding duplicates of the Schema Group until there is one group for each desired duplicate field.
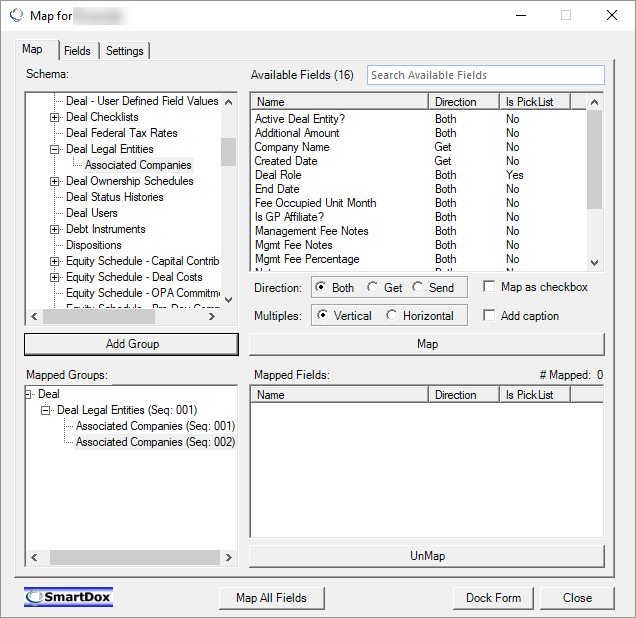
If a field has been incorrectly mapped, you can remove it from the template by selecting the field name in the Mapped Fields section and clicking UnMap in the Map for ProLink SmartDox window.
After all desired fields have been mapped in the template, click Close and save the template.
Test the template to verify that all fields have been mapped correctly. See Template Testing for detail.